Biometric Check-in Email To Student
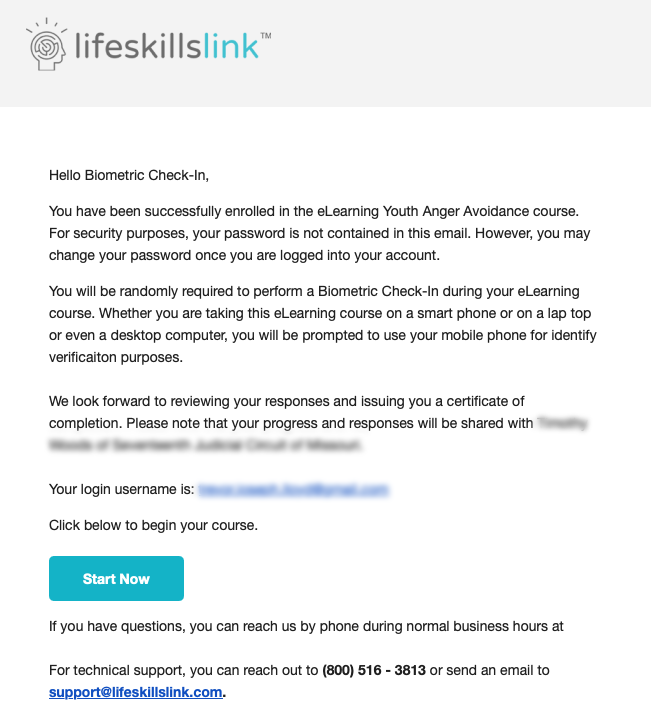
Once Biometric Check-in has been selected by the referring agency, the student will receive an email informing them that a biometric check-in will be required at certain points while taking the course, and that an active email address and a smartphone with a good internet connection is required.
In-course Check-in Via QR Code
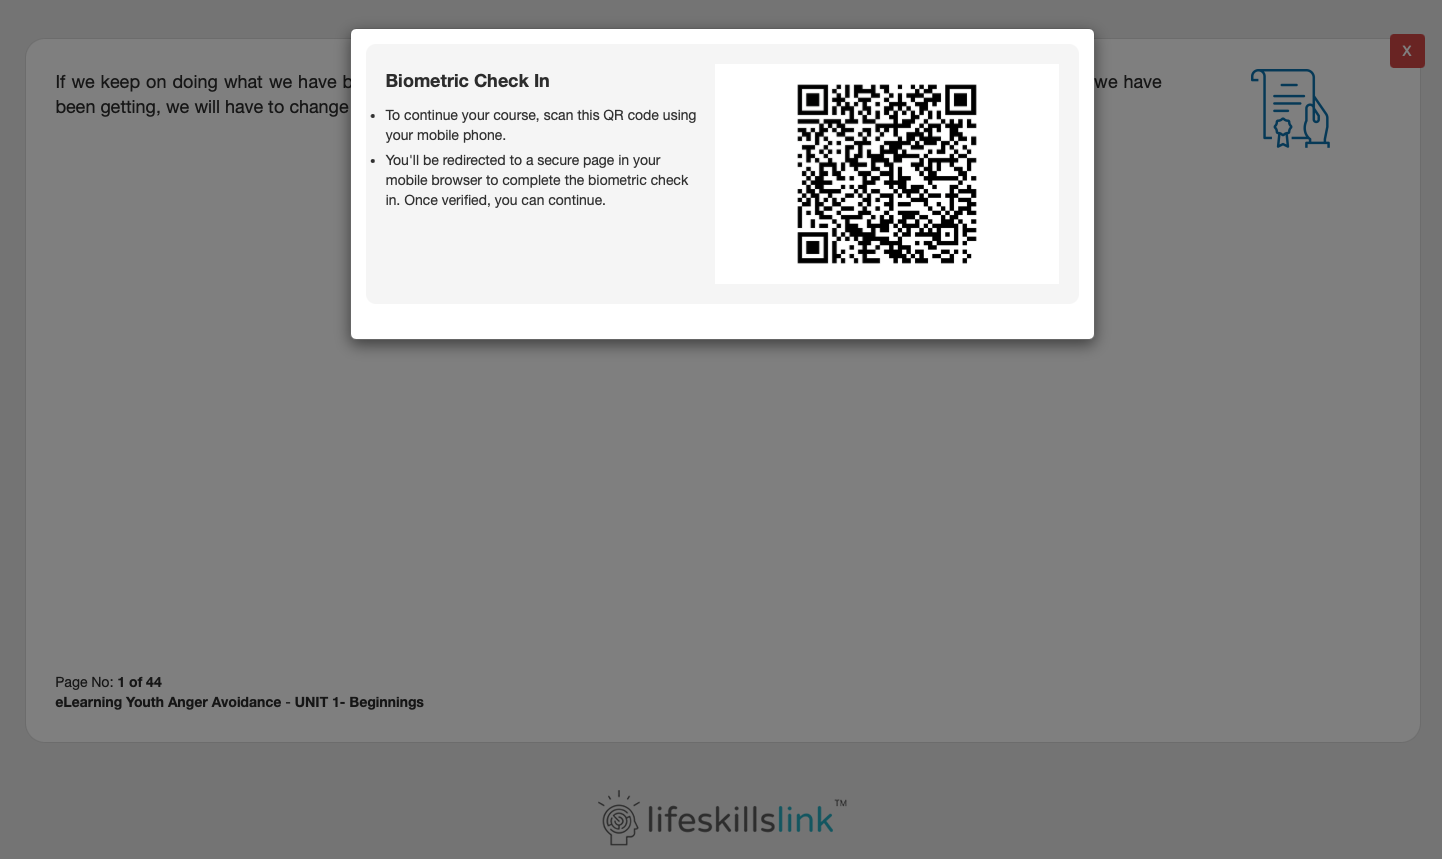
At any point while taking an eLearning course, the student will see a notification indicating a biometric check-in is required. A student who is using a laptop or desktop computer must scan the QR code with their smartphone camera to proceed. For students who are using a smart phone to take their course, they will be presented with a button to click to initiate the check-in.
Smartphone Authentication
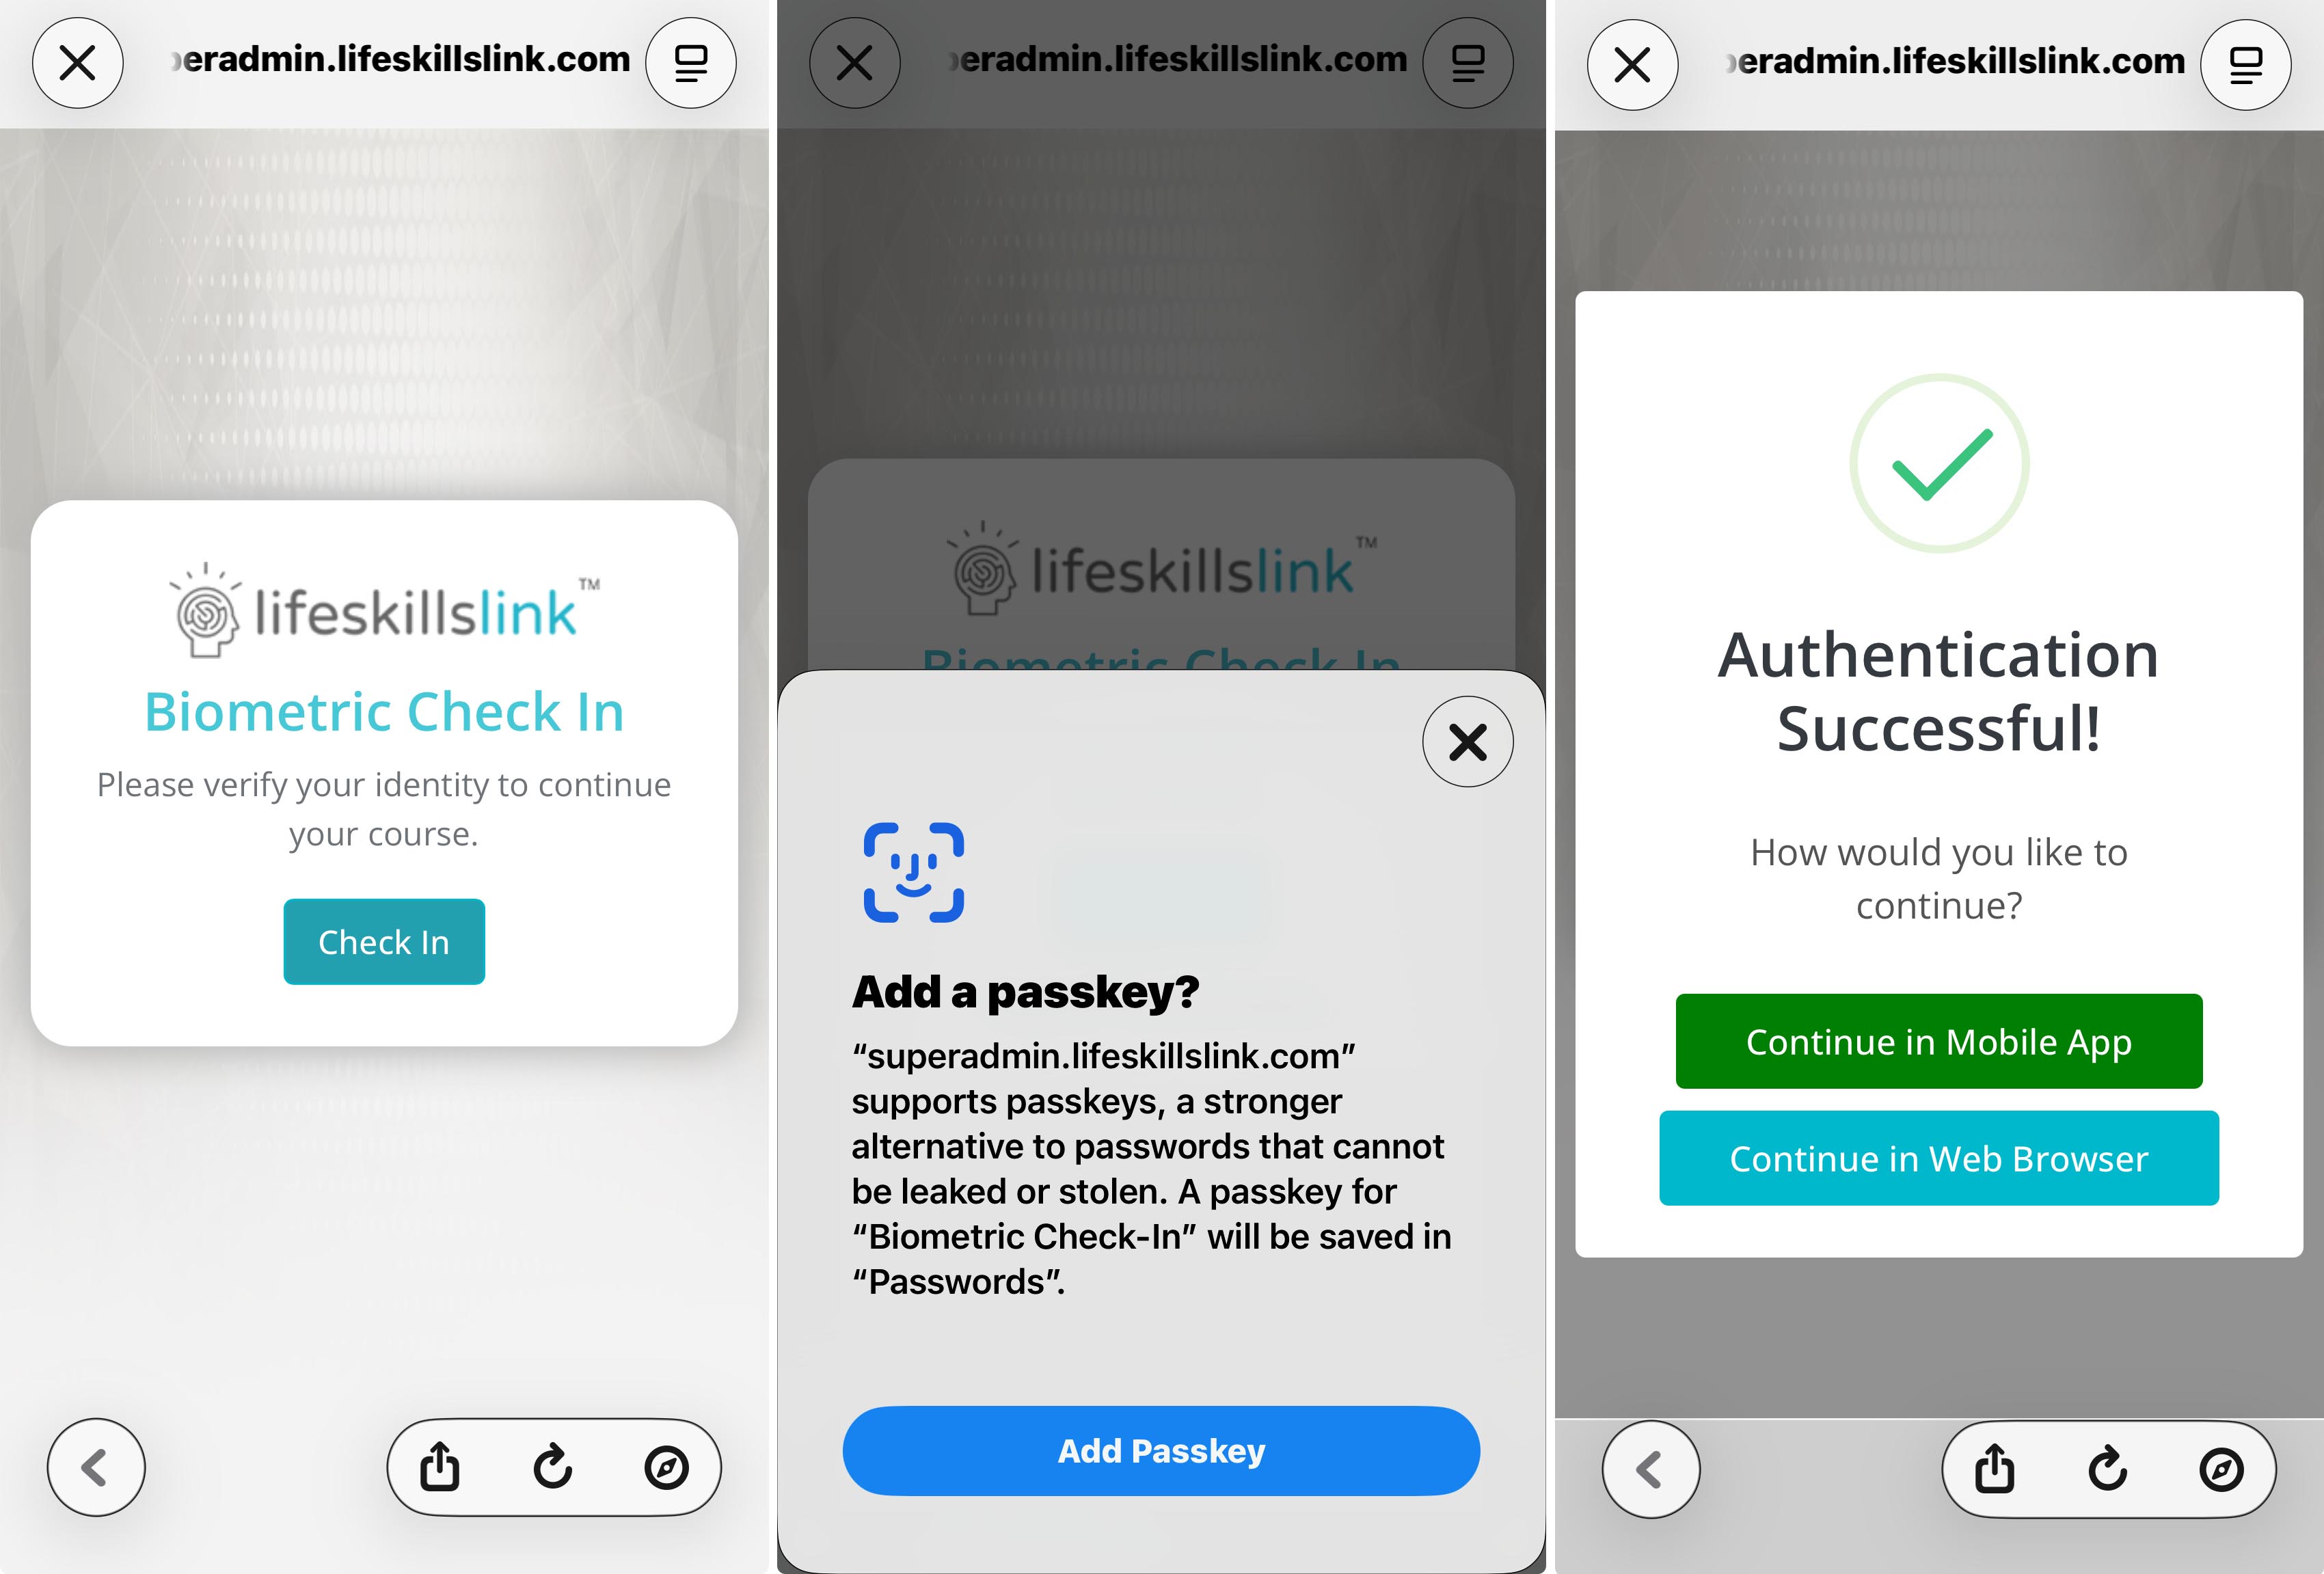
Students will then be required to use their mobile phone to check-in using seamless iOS and Android native biometric user authentication. Students will not be able to advance in their course without a successful authentication.
Student Resumes Course After Successful Authentication
Once the Biometric Check-in is successfully completed, the student may resume taking the course.
Admin Users Can View Check-ins
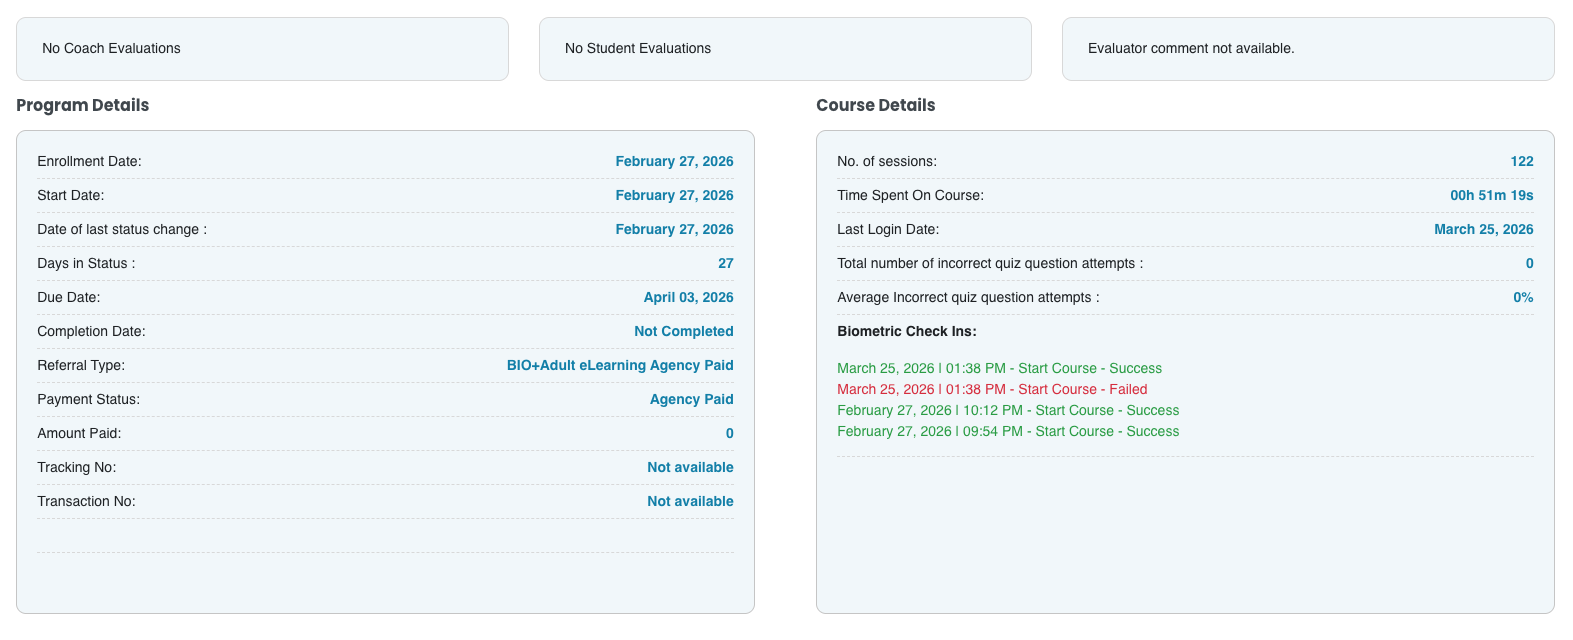
Admin and Super Admin users can view the login of successful and unsuccessful check-ins.